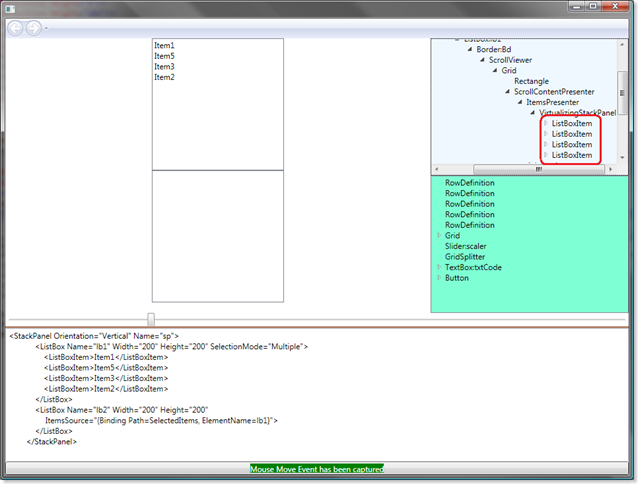
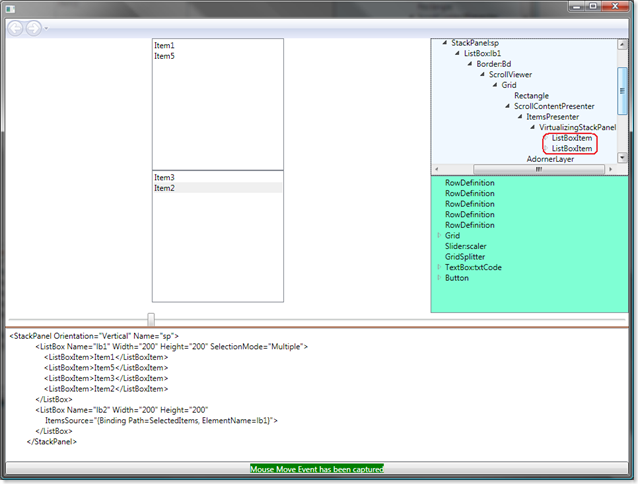
UI Virtualization is a technique adopted by WPF where the framework creates only those UI elements that are visible to the user. For example, if you have 1000 textblock controls inside a ListView and you can only view 10 of them, then only 10 textblocks would be present inside the VisualTree. As you scroll down, those elements which are no more visible would be disposed and the next set of visible items would be created. This type of virtualization gives great UI performance benefits in both speed and memory.
UI virtualization in WPF is provided by means of VirtualizingStackPanel and is enabled by default. You could explicitly specify UI virtualization on/off on a StackPanel as shown.
<StackPanel VirtualizingStackPanel.IsVirtualizing="True"></StackPanel>
Note that UI Virtualization works only as long as the ItemsControl generates its own template. If a template is generated and then added virtualization would be disabled. So, the catch with UI Virtualization is that it is disabled in certain cases. One such case is where you override ItemsPanelTemplate or Template of an ItemsControl. In such cases where ItemsPanelTemplate is customized by the developer, UI Virtualization would be disabled. So, if your ItemsControl would show loaded data, then you are in trouble. To avoid this and to enable UI Virtualization inspite of overriding ItemsPanelTemplate, we need to use a VirtualizingStackPanel.
In order to test out the effect of having virtualization and not having it, I wrote a simple application. It has a listview whose itemspanel template has been customized - first with normal StackPanel and then VirtualizingStackPanel. It loads textblocks from a list of names.
When I ran a test with 1000000 items in the list and in case of no-virtualization, the program never started. It took almost 2 GB of memory and never saw the light. So I had to kill it. Then with virtualization, the program started in no time and only had 200MB memory usage. Before that let us look at the XAML and code behind I used. It also shows you how to customize ItemsPanelTemplate and use VirtualizingStackPanel.
<Windowx:Class="NiceControlsTest.Window2"
xmlns="http://schemas.microsoft.com/winfx/2006/xaml/presentation"
xmlns:x="http://schemas.microsoft.com/winfx/2006/xaml"
Title="Window2"Height="300"Width="300"Loaded="Window_Loaded">
<Grid>
<ListView ItemsSource="{BindingNames}"Name="lv">
<ListView.ItemsPanel>
<ItemsPanelTemplate>
<!--<StackPanel/>
If StackPanel was used, the memory consumed was over 2GB and dead slow.
-->
<VirtualizingStackPanel>
<!--Memory footprint is only 200 mb-->
</VirtualizingStackPanel>
</ItemsPanelTemplate>
</ListView.ItemsPanel>
<ListView.ItemTemplate>
<DataTemplate>
<TextBlock Text="{Binding}"/>
</DataTemplate>
</ListView.ItemTemplate>
</ListView>

</Grid>
</Window>
The Code behind is very simple.
public partial class Window2 : Window
{
public List<string> Names { get; set; }
private DateTime start;
public Window2()
{
start = DateTime.Now;
InitializeComponent();
Names = new List<string>();
for (int i = 0; i < 10000; i++)
Names.Add("Name : " + i);
lv.DataContext = this;
}

private void Window_Loaded(object sender, RoutedEventArgs e)
{
MessageBox.Show((DateTime.Now - start).TotalSeconds.ToString());
}
}
I did a precise measurement on time taken from construction of window to loading the window. It was noticed that using just the StackPanel, for the 10000 items used ( I reduced the number for faster measurements ), the memory used was around 176 MB and start up time was between 7 to 10 seconds. While with VirtualizingStackPanel, the memory footprint was just over 16 MB and the start up time was between 0.3 to 0.8 seconds.
Personally, I feel its a great benefit to us developers. We can design and develop large scale heavy duty graphical applications and yet need not worry about optimization to certain level.


